One of the most common things that I have seen developers working with ASP.NET Core struggle with, is the way to centrally and consistently handle application errors and input validation. Those seemingly different topics are really two sides of the same coin. More often than not, exceptions are just allowed to bubble all the way up and left unhandled, leaving the framework the responsibility to convert them to a generic 500 errors. In many other situations, exception handling is fragmented and happens in certain individual controllers only. With regard to input validation, we often have completely customized ways of notifying the client about input issues or – at best – we leave everything to the framework and let it work its defaults via the ModelState functionality. What I wanted to show you today is how you can introduce a consistent, centralized way of handling exceptions and request validation in an ASP.NET Core web application. Problem Details One of the key things about building usable HTTP APIs is consistency. Having consistent responses in similar situations is absolutely crucial when building a maintainable, usable and predictable API. As usually in life, there is no need to re-invent the wheel here. RFC7808 actually defines a problem detail type “as a way to carry machine-readable details of errors in a HTTP response to avoid the need to define new error response formats for HTTP APIs”, so it would be a good idea to just embrace that. And that applies both to input validation (4xx responses) and server errors (5xx responses). What’s even better, is that the ASP.NET Core MVC framework, since version 2.1,...
When multiple internet operated electronic devices like smartwatches, webcams, monitors, tablets, PCs, etc., are collectively referred, and then a terminology called ‘Internet of Things’ (IoT) comes into existence. IoT is turning out to be the technology of the future as various enterprises have embraced it – according to IDC prediction, in 2020 around $1 trillion will be spent by innovators on IoT technology. However, the use of IoT in iOS 11 is a new way that will empower iOS that makes it important to address topics like how to use IoT in iOS 11 for mobile app development By narrowing down the operational area of IoT, it has been recorded that the IoT mobile application industry is exploding at a very high speed. That’s because the number of internet operated devices is rapidly increasing in an average household – from automation trend to advancement in the technology, everything has surged mobile app development using industrial IoT technology. IoT and mobile app development both are the same sides of one coin because to create IoT ecosystem mobile apps are mandatory and to use automated apps, IoT devices are compulsory. So, they both are important to sustain one another. How to Use IoT in iOS Swift? The relationship of IoT and mobile app development is very deep, but when iOS 11 is thrown into the mixture, then this trio became highly powerful. The integration of IoT into iPhone app development is one of the hottest technologies making the rounds these days. Interestingly, how to use IoT in iOS isn’t a fun topic anymore as iOS app development has gone beyond entertainment....
How to port desktop applications to .NET Core 3.0 In this post, I will describe how to port a desktop application from .NET Framework to .NET Core. I picked a WinForms application as an example. Steps for WPF application are similar and I’ll describe what needs to be done different for WPF as we go. I will also show how you can keep using the WinForms designer in Visual Studio even though it is under development and is not yet available for .NET Core projects. About the sample For this post, I’ll be using a Memory-style board game application. It contains a WinForms UI (MatchingGame.exe) and a class library with the game logic (MatchingGame.Logic.dll), both targeting .NET Framework 4.5. You can download the sample here. I’ll be porting the application project to .NET Core 3.0 and the class library to .NET Standard 2.0. Using .NET Standard instead of .NET Core allows me to reuse the game logic to provide the application for other platforms, such as iOS, Android or web. You can either watch Scott Hunter and me doing the conversion in the following video, or you can follow the step-by-step instructions below. Of course, I won’t be holding it against you, if you were to do both. Step-by-step process I suggest doing the migration in a separate branch or, if you’re not using version control, creating a copy of your project so you have a clean state to go back to if necessary. Before porting the application to .NET Core 3.0, I need to do some preparation first. Preparing to port Porting main project Create new project <PackageReference Include=“Newtonsoft.Json” Version=“9.0.1” />...
TL;DR: This article will show you how to use Laravel to implement a basic GraphQL API and how to secure it with Auth0. Throughout the article, you will learn how to implement the API step by step up to the final result. You can find the final code on this GitHub repository. The API You Will Build The project you are going to build is an API providing a list of wines from all over the world. As mentioned before, you will build the API following the GraphQL model. This model allows a client to request the exact data it needs, nothing more, nothing less. You will implement the GraphQL API by using Laravel, one of the most popular PHP frameworks that allows you to set up an application in minutes by exploiting its powerful infrastructure. Finally, you will learn how easy it is to secure your GraphQL API with Auth0. Before starting the project, ensure you have PHP and MySQL installed on your machine. You will also need Composer, a dependency manager for PHP. Once you have these tools installed on your machine, you are ready to build the Wine Store API. Setting up the Laravel PHP Project The first step to create a Laravel project is to run the following command in a terminal: This command asks Composer to create a Laravel project named winestore. The result is a new directory called winestore right where you ran the command. This directory will have a few files and subdirectories as shown in the following picture: Don’t worry if you are not acquainted with Laravel’s structure. While you will...
How to create an app? It is the first question that arises once businesses have decided to create an app to further their enterprise. Businesses may know their target audience, demand, and supply. They may also know that the idea of creating a mobile app is going to be successful, and that it could potentially be a million-dollar idea. The thing stopping them is that they do not know how to develop a mobile app. In this post, we share a step by step guide to building a mobile app. 1. Define your purpose Many companies and start-ups make a mistake of not defining clear objectives while developing a mobile app. It is nearly impossible to get expected benefits if the purpose is not precise. Before developing a mobile app, it is vital to find answers to such questions. How can your app create a difference? How can it be helpful to customers? Is your app going to reach more customers? Or is it just for brand awareness? After getting answers to the above questions, you should look for improvements in your business through the app, as well as the expected outcomes. These things need to be crystal clear before going further. 2. Discuss features and functionalities After defining the objectives, the second most crucial step is to discuss the functions and features of the mobile app. One of the essential parts of developing a mobile app is to write down all the necessary functionalities and features. You can integrate features such as ML, AI, Payment Gateway integration, Real-time tracking, Face Detection, and others in your mobile app. If...
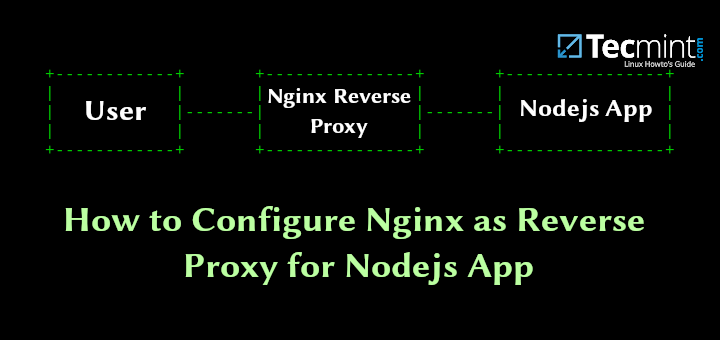
Nodejs is a free open source, lightweight, scalable and efficient JavaScript framework built on Chrome’s V8 JavaScript engine, and uses an event-driven, non-blocking I/O model. Nodejs is now everywhere, and has become so popular for developing software from websites, web apps to network apps and more. Nginx is an open source, high-performance HTTP server, load balancer and reverse proxy software. It has a straightforward configuration language making it easy to configure. In this article, we will show how to configure Nginx as a reverse proxy for Nodejs applications. Note: If your system already running with Nodejs and NPM, and have your app running on a certain port, go straight to Step 4. Step 1: Installing Nodejs and NPM in Linux The latest version of Node.js and NPM is available to install from the official NodeSource Enterprise Linux, Fedora, Debian and Ubuntu binary distributions repository, which is maintained by the Nodejs website and you will need to add it to your system to be able to install the latest Nodejs and NPM packages as shown. On Debian/Ubuntu On CentOS/RHEL and Fedora Step 2: Creating a Nodejs Application For demonstration purpose, we will be creating a sample application called “sysmon”, which will run on port 5000 as shown. Copy and paste the following code in the server.js file (replace 192.168.43.31 with your server IP). Save the file and exit. Now start your node application using the following command (press Ctrl+x to terminate it). Now open a browser and access your application at the URL http://198.168.43.31:5000. Access Node App from Browser Step 3: Install Nginx Reverse Proxy in Linux We will install...
developers in singapore,web design singapore,web application singapore,web development company singapore,mobile apps singapore,website developer singapore,web design company singapore,mobile developer singapore,mobile app development singapore,mobile app developer singapore,singapore app developer,graphic designer in singapore,design firms in singapore,singapore website design,singapore mobile app developer,web designer singapore,mobile apps development singapore,app developer singapore,developer in singapore,design agency singapore,web design services singapore,website development singapore,ios developer singapore,android developer singapore,website designer singapore,mobile application development singapore,web development singapore,singapore mobile application developer,ios app development singapore,singapore web development,mobile game developer singapore,ruby on rails developer singapore,singapore web design,website design singapore,app development singapore,singapore web design services,mobile application developer singapore