Laravel has a great Auth system out-of-the-box, with just a few commands you can have Login/Register functions ready. But let’s dive a little deeper and see what we can easily customize.
1. Disable Registration
What if your app has pre-registered users, or they are created by administrator, and there’s no public registration?
Since Laravel 5.7, All you need to do is add a parameter in routes/web.php:
Then you won’t see Register link in top-right corner, and the route /register will show 404 page.
2. Enable Email Verification
Another new feature of Laravel 5.7 is email verification, with database field users.email_verified_at. By default, it is disabled, but all the necessary fields and routes are generated, just hidden.
To enable this function, just pass a parameter in routes/web.php:
Also, make sure to run php artisan make:auth so it would generate necessary views for users to see after they click verification links.
Finally, if you need some routes available only to verified users, use verified Middleware:
3. Disable Reset Password
By default, php artisan make:auth command generates the Bootstrap login/register pages, along with one for resetting the forgotten password.
But if you want to disable that feature, and have some other mechanism to recover passwords, there’s another parameter in the routes/web.php:
Notice: you can combine this with the previous tips about registration and verification, and have this in your routes/web.php:
The underneath actual routes are listed in one method in vendor/laravel/framework/src/Illuminate/Routing/Router.php:
4. Redirect After Registration
By default, new registered users are redirected to URL /home. Perhaps, you want to change it, it’s done in a file app/Http/Controllers/Auth/RegisterController.php:
Just change this one parameter, and that’s it.
But what if you have more complicated logic than just one static URL? For example, you want to register to different URLs based on the role of new user. Then you can create a separate method in the same class RegisterController, with name redirectTo():
The method behavior will override $redirectTo property value, even if the value is present.
5. Change Field Validation Rules
Default Auth has four fields:
All of them are required, and these validation rules are specified in the same app/Http/Controllers/Auth/RegisterController.php:
So if you want to change any of these, like adding more complicated password requirements than just 6 symbols minimum, just edit this validator() method.
6. Disable Auto-Login after Registration
Another default behavior that you may want to change is auto-login immediately after the registration form. You may want to redirect your user to a separate “success” page and expect them to log in manually later.
To do that, you need to override register() method of a trait RegistersUsers.
The controller we discussed above, RegisterController, uses this important Trait:
This trait performs all the “dirty work” of registration. It is part of the core framework, located in vendor/laravel/framework/src/Illuminate/Foundation/Auth/RegistersUsers.php:
To disable auto-login, you need to delete this particular line:
But you can’t edit directly Laravel core, or any part of what’s inside /vendor. What you can do is override the same method and put it in your RegisterController, like this:
Finally, take care of redirectTo parameter or method, as shown in previous tip, so your registered user would land on a correct page.
7. Adding More Fields to Registration Form
The most typical example of this would be adding a surname field, in addition to default name. There are a few steps you need to do here:
Step 1. Add field to the database.
Just add this line to some migration file: $table->string(‘surname’);
Choose to edit existing default migration file, or create a new one with php artisan make:migration add_surname_to_users_table.
By default, app/User.php has this:
So you need to add your new ‘surname’ into that array.
Step 3. Add the field to View form.
You need to edit resources/views/auth/register.blade.php file and add another field, probably copy-paste all the code for name field and change some parts of it.
Step 4. Modify create() method.
Here’s how default method looks in RegisterController:
Guess what, you just need to add another line related to surname, so final result is this:
8. Login with Username instead of Email
By default, email is the most important field for user, it is used as a unique identifier and is part of the credentials. But what if, in your case, email is just an informational field, and actual login credential is another one, like username?
First, take care of adding that field into the database/model/views, like discussed in previous tip.
Next, you need to take a look at app/Http/Controllers/Auth/LoginController, specifically one trait:
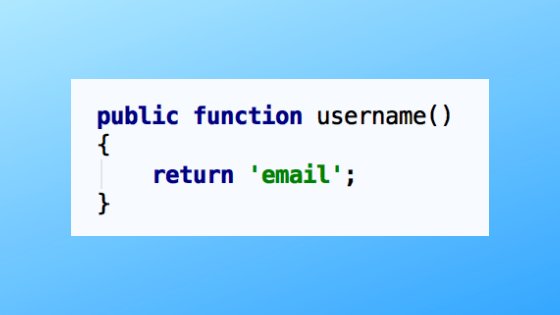
If you get deeper into that /vendor/laravel/framework/src/Illuminate/Foundation/Auth/AuthenticatesUsers.php trait, you will see one method:
See, it’s just a constant field returned by a function. And then it is used in actual validation and authentication, in the same trait:
So all you need to do is override this method into your LoginController, similar to what we did with redirectTo parameter previously in this article.
So, these are the tips I wanted to share in this article. Anything you would add?
Check out our Laravel online courses!
This content was originally published here.


